Healthy Unstuffed Cabbage Rolls

When I was little my mom used to make a cabbage soup whenever she was on her Weight Watchers diets.  Try as I might (and I very much tried as a chubby high school student) I could never stomach it.  The cabbage just grossed me out.  But it is so healthy that I have tried in various ways in my adult life, never to love it.  However, this my friends is a cabbage recipe for cabbage haters!  It is so tasty and delicious even my two year old eats it and says yummy!!!

Ingredients:

1 small-medium head of cabbage

1/2 white onion

2-3 garlic cloves

2-4 sticks of celery

1 lb ground meat – I used a mix of turkey and beef this time

1 pint of chopped tomatoes – a large can could work

1 tbs tomato paste

1/2 c vegetable or chicken broth

1/2 c water

1 tbs cumin

1 tbs oregano

1 tsp basil

2 bay leaves

salt and pepper to taste


Method:

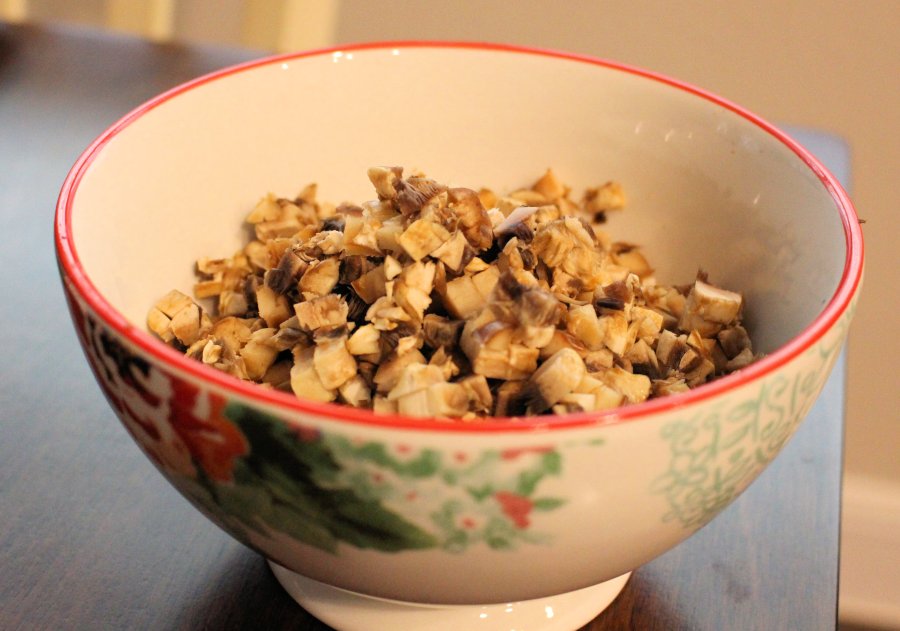
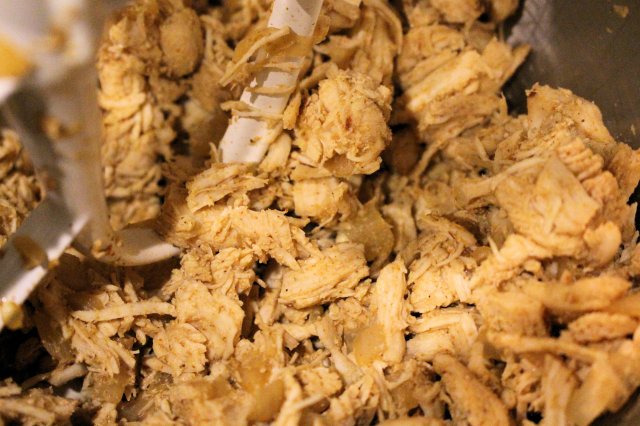
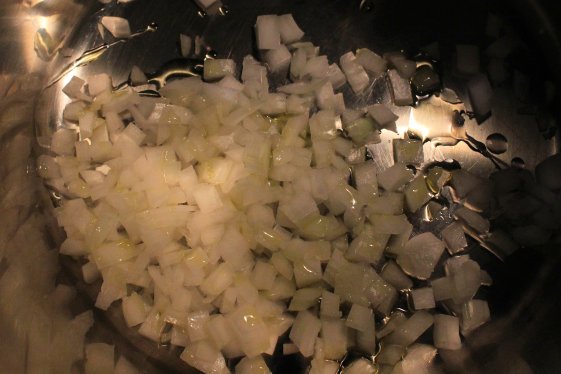
First is my favorite part.  Chop your veggies while you let your meat brown.  I once worked as a soux chef at a Caribbean restaurant and my job on Saturday mornings was to hand chop veggies for all the salsas and sauces and I loved it!  Weird I know but there is something to the rhythm of it all that I find calming. IMG_4938 -1

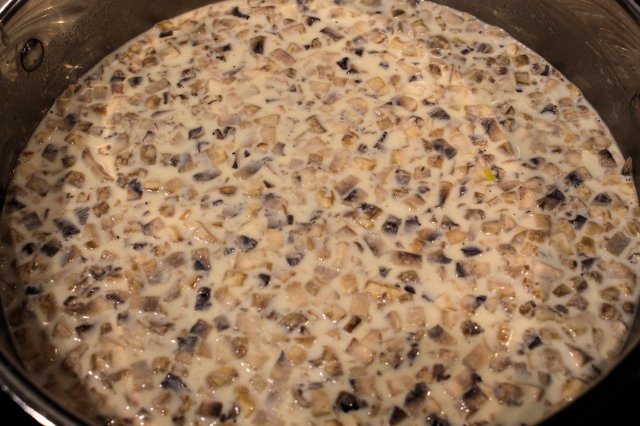
Once the meat has browned, drain the excess oil, and then mix with tomatoes, paste, garlic, onion, celery, herbs, and liquids and bring to a simmer. It should look colorful and lovely! IMG_4946 -1

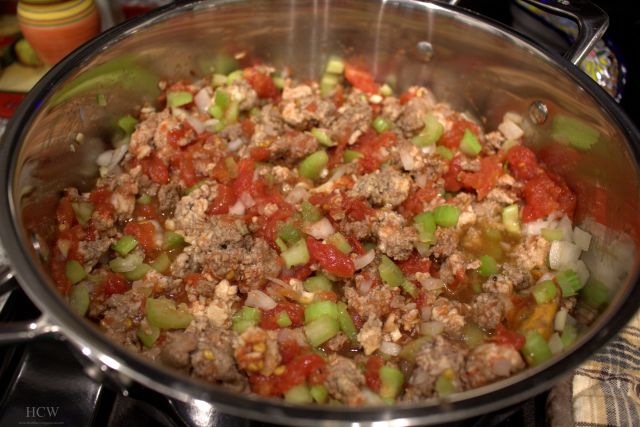
Next fold in the cabbage.  Cover and let cook on medium heat 15-20 minutes or until cabbage and veggies are tender.  The broth and the tomatoes will turn the cabbage a gorgeous and yummy golden color.  Cool and enjoy!! IMG_4955 -1

Happy Cooking!!

Tempering Chocolat

One of my confessions is that I LOVE to work with chocolate.  If I could work all day with chocolate and have a stable income I would do it in a second.  I enjoy everything about it, the smell, the process, even the fickleness of it!  Tempering chocolate is just that, fickle.  It is a delicate process but one you have to learn to be able to truly work with chocolate versus just melting it and dipping stuff so if it doesn’t work right the first time don’t get discouraged.  When I first started working with chocolates it was the hardest thing for me by far but now I truly enjoy it!  Tempered chocolate is chocolate that sets quickly at room temperature, hardens as it dries, is shiny, has a smooth mouth taste, and doesn’t use its luster or soften at room temperature, think Godiva or a fancy chocolatier. Here is how to temper your own!

What you need:

Chocolate!! Good Quality – I used Ghiradelli milk chocolate- it can be dark, milk, or white this has instructions for all! The more you make the longer it will hold its temper.

A glass bowl- these are my absolute favorites for chocolate!

A digital thermometer- this is the one I use for chocolate

Method:

Chop your chocolate up! This is easier to do with bars than with chips but both need to be chopped.

IMG_4835

Once it is chopped you can either use a microwave (easiest and safest) or a double broiler. If you use the broiler make sure no water or steam touches the chocolate. Chocolate hates water!  Either way you are going to melt 70-75% of your chopped chocolate.  For microwaving, use 60 second intervals at 50% power stirring each time until the chocolate reaches between 155°-120°F (46°-49°C). Let set for 10 minutes.

IMG_4832

Once ten minutes is up you begin the “seeding” method which is adding chopped chocolate to the melted chocolate to reduce the temperature. Add handfuls and stir until fully incorporated and test the temperature each time. Your goal is to reach 86°F (30° C) for dark or 81°F (27°C) for milk or white. If I am tempering milk or white I only melt about 70% of my chocolate because it takes more to seed it. IMG_4837

Now it gets weird. Once your temperature is set you reheat the chocolate (I know but bear with me because it is so worth it).  For dark you need to reach 89°F (32°C) and for milk or white you need to reach 86°F (30°C).  Now you test for your temper. There are a few ways to do this but my favorite is the smear method. You just pour a strip of chocolate on parchment or wax paper and smear it a bit bit. If the line is clean and holds its shape it is tempered.  If it seems uneven or separated it is not.  The only trick now is to maintain the temper.  The easiest way to do this is reheat in small 4 second spurts and add some more chocolate if necessary. Once your chocolate heats over 90°F (32°C) the temper is broken so be careful!

You can use this to dip fruits, truffles, or do molds!

Happy Chocolate Making!!!

Homemade Cream of Mushroom Soup

This is soup and base became a staple in our family when I was pregnant.  I was the stickler of the no and even the not so much lists that my doctor gave to a ridiculous degree.  I was shocked to learn that anything in a metal soup can is a “no” to pregnant women.  I kind of decided right then that maybe this stuff was a bad idea all together.  My mom of course had the solution.  Now my mom and I make cream soups (cream of mushroom and usually cream of chicken too) a few times a year and freeze them.  I will preface that this is a recipe that isn’t “healthy” by the 21st century standards. It is not low fat or low calorie (although I am sure you could tweak it to be more so). However, on my journey of living a healthier life I have learned that it is not always the fat content that makes it healthier, many times it is the simplicity and the REAL ingredients that do. If your grandma was like mine or like my husband’s fat content wasn’t really their biggest priority in amazing meals either. In cream of mushroom soup that you find in a can at the grocery store there are over 50 ingredients…..including sugar…and including about 30 that I can’t pronounce let alone tell you what they are…..(just giving you time to let that sink in)………in this recipe there are 10 ingredients and I promise it tastes so much BETTER!!

Ingredients:

1 c heavy cream

1/2 c milk

3/4-1 c chicken or vegetable broth

1/4 c butter (half a stick)

1/4 c flour

4 garlic cloves thinly sliced or chopped

2-4 tbs diced onion

8 oz stemmed and chopped mushrooms

salt and pepper to taste


Method:

Start by getting your ingredients ready because once you start it goes quick!

IMG_4440

Melt butter and flour and cook just long enough to make a white roux (2-3 minutes). Add salt, pepper, onions, and garlic and simmer for just a minute.

IMG_4449

Then add liquids and mushrooms. Bring the soup to a boil and then cook on medium heat until it thickens (about 10-15 minutes). Use immediately or cool and bag to freeze. This recipe makes a little more than 4 cups.

IMG_4464

This is finished delicious product. It is tasty and just about the easiest thing to use for a quick dinner! Last week I tossed a cup of it with a chopped chicken breast, brown rice, and 1/2 water for a one pot hit with the whole house.

IMG_4472

Happy Cooking!!!


Healthy Chicken Tortilla Soup

Today’s recipe is easy, yummy, healthy, and perfect for chilly days and nights! It’s basically just a simple take on chicken tortilla soup that never has leftovers. I tried to take as many pictures with the aid of my two year old helper. I do cook my own beans once a month, we freeze fresh corn every July, roast and bag chilies in the fall, and can tomatoes every summer so my measurements might be a little off. But like most of the stuff I cook or bake, eye it and make to taste for your preferences. While there are rare exceptions (get ready for some Easter Macarons!) I usually see recipes as the basic idea that I can tweak and make my own and hope you do the same. This recipe is from my mom that I tweaked a bit to work for me.

Ingredients

1-2 chicken breasts – about a pound to a pound and a half depending on your preference

2 ears of corn cut from the cob – or a small bag of frozen

1 pint of tomatoes – 1 large can 12-19 oz

1 bag of black beans – 1 large can 19 oz

2-4 tbs of green chilies – you could also use half-1 small can of diced green chilies

1/2 white onion diced

Juice of 1 lime

4 cups liquid – I usually do about 3 cups broth + cup water

1 tbs garlic powder – or a couple fresh cloves, I just didn’t have any handy

1/2 tsp white pepper

1/2 tsp black pepper

1 tbs caldo tomate

1-2 tbs cumin – to taste for you, I’m obsessed with it so I always use more

1 tbs chili powder

1 tsp paprika

1/4 cup cilantro + some for garnish

Optional

Cheese, Tortilla strips, Plain Greek Yogurt, or Crema to top


Method:

First, cook chicken. You can brown it but I usually boil it for soups to have some water to use and to quickly get it cooked thoroughly. Then I toss it in my Kitchenaid Stand Mixer with some chili powder, garlic powder, and cumin and shred it up! IMG_3089


Then toss the onion and garlic into your pot with about a tablespoon of olive oil and saute until the onion is clear. Add chicken once it reaches that stage.


IMG_3065

Then add your corn and let it cook for about 2 minutes. I love the smell of fresh corn!!

IMG_3087

Now add your black beans, tomatoes, green chilies, lime, and liquid and bring to a boil. Reduce to a simmer and add seasonings and cilantro. Simmer for at least 1-2 hours.

IMG_3092


Add garnish of cheese, tortilla strips, cilantro, or cream and enjoy!!

IMG_3154

Happy Cooking!!


Easy and Simple Fruit Snacks

I think a battle many of us have as moms, or just people in this world, is the reality that sadly so much of our food contains artificial ingredients. From sweetners to dyes something always seems to be chemical. I have tried, especially since becoming a mother, to find more homemade ways to make a variety of foods that come more commonly “processed.” One of these as a the mother of a toddler is fruit snacks! Thomas first tried these when he sweet talked another child at daycare for some and came hold requesting something we had never had in our house. We have tried a variety of “healthier” alternatives but nothing ever quite did it for him before today.

DISCLAIMER: These are not beautiful and I will be updating this post with some more experiments on improving their appearance but they are so super yummy!!! Toddler and mom approved!

Ingredients:

1 Large Apple – or 2 small – I used a large Honeycrisp

1 cup Strawberries – stemmed and cored

1/2 cup blueberries

juice of 1/2 a lemon

1-2 tbs sugar

IMG_3878

Method:

First puree in a food processor the fruit and lemon juice until it is smooth.

IMG_3880

Then in a small pot on low-medium heat bring to a simmer, stirring almost constantly. Add sugar here.

IMG_3884

Continue stirring until the fruit thickens and is reduced and gorgeous! About 5-8 minutes.

IMG_3888

Line a baking sheet or 13-9 pan with parchment paper and pour mixture out evenly. Bake at 200° F for 4 hours until it is slightly sticky but doesn’t stick to your finger.

IMG_3892

   Because I used a cookie sheet mine came out so thin it broke apart. I am going to try a         13 x 9 pan next time to see if I can get them slightly thicker to keep shape but will probably take longer to cook.

IMG_3904

Happy Baking!!

Espresso Tuxedo Truffles

What seems like just a couple years ago (in reality nearly ten) I was working as an underwriter for an insurance company. Pretty much my job was to answer calls from agents and tell them what they could or couldn’t do or more often than not why they couldn’t. To say that it wasn’t the most exciting, I can’t wait to get to work, want to do this forever job is an understatement. However I was dating (now married to) a guy who lives his dream every day with his career. It was difficult to be as frustrated as I was and supportive at the same time. My solution was to find a challenging hobby that would take time to learn but that I could enjoy, so I dove head first into chocolate making. For nearly a year I stuck to recipes and trying different techniques. This was the first truffle I made solely on my own and I have never stopped loving it. I don’t make it often because chocolate making can take days and that is hard with a toddler but I always enjoy it when I do! This recipe is perfect for Valentines too!

Ingredients

1/4 cup Heavy Whipping Cream

1/2-1 shot espresso – you can brew your own if you’re super fancy. I went to Starbucks

1-2 tbs good quality salted butter cubed and at room temp – I used Central Market brand

8 oz good quality bittersweet chocolate – I used Ghiradelli 80% this time

4-8 oz good quality white chocolate – I used Ghiradelli

good quality ground espresso or coffee beans for dusting

Method

First chop the bittersweet chocolate and place in glass bowl – glass is the best for working with chocolate because of how it distributes the temperature.

Next in a small sauce pan bring the cream and espresso to a rolling boil. Then pour the cream mixture onto the chopped chocolate. Let sit for 2 minutes! This allows the chocolate to begin melting into the mixture. Slowly using a whisk blend the mixture and chocolate. At first stir in one direction. It is SUPER important to do this very slowly because you don’t want to introduce air into the mixture and too fast will make the chocolate separate and you will end up with a broken ganache and a sad gooey mess. Once it is emulsified add the butter and continue stirring until combined. It should look rich, silky, and delicious!

IMG_3421

This makes me happy everytime!! Next use a pipping bag to put the ganache onto baking sheet lined with parchment paper to set. Set it at room temperature somewhere dry overnight if you can or for a least a couple hours. Moisture is bad for the chocolate which is why you don’t want to put it in the fridge.

IMG_3425

Once they have set roll them to make sure they are in the form you want. At this point you could roll in cocoa,nuts, or other toppings, or you could dip them. To make them tuxedo (white and black or dark) I dip them in white. I love the white with dark chocolate because I think the dark brings out the espresso best and the super sweetness of the white compliments the slight bitterness of the dark. IMG_3442

Once the chocolate has been tempered (more on that in a later blog) I use a Wilton chocolate bowl to keep it at a steady temperature. I double dip these lovelies to make them coated in two thin layers. Place on a new sheet of parchment paper and let set. While they are setting lightly sprinkle with ground espresso. IMG_3444

Enjoy!!

IMG_3448

Check back with us soon we have some big news coming!

Happy Baking!!


Easy and Perfect Good Luck Salsa

Growing up in the South one of the New Years traditions is to eat black eyed peas for good luck. My mother is cajun through and through, which is one reason I think she just loves most superstitions. But regardless of her reasons, she always made us eat black eyed peas (at least 12 for the months) growing up. My confession is that I have always hated them!! I think they smell awful and my little dramatic childhood self would feign gagging on each bite.

All that changed when my sister introduced us to Texas Caviar. The kind we originally had was called Hill Country Caviar from New Canaan Farms (http://newcanaanfarms.com/) and it was amazing as is everything from them! It was essentially salsa with black eyed peas. I loved it then and LOVE it still today!!

Of course as a college kid on a budget who worked retail and didn’t live in Texas I had to figure out a way to make it since I didn’t get to go home around that time. This recipe is one I’ve tweaked over the years and is really just simple and basic pico recipe with black eyed peas mixed in but it amazingly fresh and tasty!

Ingredients

1-2 tomatoes – I used about 1 1/2 diced

1/2-1 onion – I used about a 1/2 diced

1-2 fresh jalapeños – I used 1 diced

1 clove of garlic – minced

1/2-1 bunch cilantro – really do to taste for you. I used less this time because my hubby is not a fan

1 cup black eyed peas – I measured before I cooked them. It made about two pints and I used one pint so probably a little more than a can if you bought them canned just remember to drain and rinse – cook as it says on package, cool, drain, and rinse.

Juice of 1 lime

Salt to taste – I used about 1 tbs

Avocado to garnish – I would add it right in but it lasts longer if you add this as you eat

First combine tomatoes, onions, jalapeno, cilantro, and peas. You can dice using a food processor and the entire process takes about 10 minutes. Then add juice and salt to taste. If you like blended salsa you could definitely do that here and have it smoother but I like chunky.

Enjoy as is or add avocados or anything else your heart desires. I have also seen it with corn and other yummy stuff but the simple is my favorite. This recipe makes close to 2 pint jars and will last a couple weeks in the fridge but honestly probably won’t last that long because it is amazing!!

IMG_0760 (2)

Happy Cooking and Happy New Year!

My ABC’s of Thanks

The Thanksgiving season is one of my favorite times of year. Family visits, birthdays, the beginning of the holiday season, and a time to focus on all the good in our lives. To end this season I’m writing my ABC’s of thanks to help me reflect on all that is good in a world that seems so overwhelmed with negativity. It is such a nice way to lead into the Advent season to prepare for the celebration of Christmas. I hope you do the same!

A – I am thankful for the Advent season.

B – I am thankful for Babies. They are always a sign of hope and good.

C – I am thankful for my sisters, my birth and marriage. Chessie and Cheryl have had an influence on my life and it is so much better with them in it.

D – I am thankful for our Dink! He has been the light of my life every single day of his.

E – I am thankful for my sweet nephews Egan and Eli.

F – I am thankful for Fur Babies. Pets make our lives richer by loving us unconditionally their entire lives.

G – I am thankful for Grandparents and Great-Grandparents.

H – I am thankful for Holidays to take time to celebrate and create memories.

I – I am thankful for the Internet that changed everything about the world.

J – I am thankful for my nephew Jagger who is such an amazing example for our boy.

K – I am thankful for Kitchens that bring us all together.

L – I am thankful for Law Enforcement Officers that put their lives on the line to serve and protect their communities.

M – I am thankful for Mothers and especially my own. Those women who put the needs and well being of children above their own.

N – I am thankful for my three Nieces. They are all so different but all so special.

O – I am thankful for Oklahoma my native state.

P – I am thankful for my Peña family who embraced me in ways I had only dreamed of.

Q – I am thankful for the Quiet time I am able to find to reflect, pray, and just be.

R – I am thankful for the Rain. Growing up in tornado alley the rain and storms hold a special place in my heart.

S – I am thankful for Spouses. This year was such an evolving year for marriage in our country and I am thankful for all those who have fought for marriage equality for all.

T – I am thankful for Teachers. Some of the greatest people I know I have met through this profession.

U – I am thankful for Understanding. I truly feel it is the key to so many problems.

V – I am thankful for Veterans who have served and those who continue to choose to serve for their countries.

W – I am thankful for mighty Women. May we support them, love them, raise them, and be them!

X – I am thankful for X-Rays and other medical advances. This a big year for dink and it is all possible thanks to medical advances.

Y – I am thankful for Yesterdays that we are able to enjoy, endure, and leave behind.

Z – I am thankful for Zippers! Silly but Z is hard and besides if you’ve ever been pregnant you learn to miss them.


Stay tuned this weekend for homemade pralines!!


All Homemade Pumpkin Cobbler

I remember this cobbler from a place I worked in college years ago. I knew the basics that it had a filling and crust on top but didn’t know the recipe. I found this recipe that was from a Gooseberry Patch cookbook (which I adore!!) and it sounded perfect except it called for a cake mix. Let me preface that my lean towards the homemade vs convenient stemmed from my husband’s favorite show, How It’s Made. He could watch this and shows like it (How do they do it, Factory Made, etc) day in and day out. During my pregnancy we were watching one of these shows and  I don’t recollect what brand it was but the amount of chemicals put into the product just completely grossed me out and I swore if I could do homemade I would. To be honest and real I am not the person that sends back a dessert at a restaurant if I know it has some chemical, nor am I the person who doesn’t eat fast food from time to time, or the person that refuses to let my child eat anything processed. When it comes to food I believe moderation is key always. We strive to eat homemade and real foods the majority of the time and not feel guilty when we don’t. But in that same breath there are some products I haven’t used in years, one of which is boxed cake mixes. This does mean that I usually do a trial run on my son’s birthday cakes because I have had some major failures. This was the first time I was attempting to not only tweak but combine two recipes and it was for my in-laws so I was a bit nervous. Granted my father and mother in law are about the most loving and supportive people around and would have at least tasted it had it been awful to be nice but thankfully this turned out amazing!! The trick is the butter so don’t skimp on that!

Filling – almost exactly like the filling found in this recipe but without eggs. To be honest I just completely forgot but it came out so perfect it was obvious that they weren’t vital.

1 pint jar canned pumpkin (or 15 oz can)
1  can evaporated milk (I used eagle brand)
1 cup sugar (I did 3/4 c white and 1/4 cup brown and will probably do half and half next time)
1/8 teaspoon salt
1 tsp ground ginger
1 tbs ground cinnamon                                                                                                                                                            1/2 tsp nutmeg                                                                                                                                                                               1/2 tsp pumpkin spice
1 tablespoon vanilla extract

Crust

1 serving of homemade yellow cake mix using this Yellow Cake Mix but I only used 2 tbs butter and I sifted it… or you can use 1 package yellow cake mix
1 cup melted butter
1 – 1 1/2 cups chopped nuts (I used pecans)
2 tbs brown sugar

Combine filling ingredients and pour into a 13×9 baking dish (I used corningware and it was perfect). Sprinkle cake mixture on top and drizzle melted butter all over like it is going out of style! Bake for 25 minutes at 350 degrees. Sprinkle nuts and brown sugar and bake an additional 30 minutes until topping is golden brown.

IMG_2543

Top with homemade whipped cream, vanilla ice cream, or just eat plain. It is amazing!!!

Amazing all homemade Pumpkin Cobbler, perfect for fall!!

Happy Baking!!

Quick and Easy Apple Oatmeal

One of my absolute favorite things to do with homemade applesauce (recipe here!) is oatmeal for our toddler. I have made him homemade oatmeal ground since he was 6 months old and now we just do homemade with a little ground from time to time for the texture. This recipe is for one week of oatmeal for a 2 yr old so about 4 servings so feel free to change the measurements.

1/2 c rolled oats

1/3 c homemade applesauce

1/8-1/4 c milk (depends on how creamy you want it)

Heat milk on stove and add oats. Cook for 5 minutes (in a pinch I have also microwaved and it works just as well). Add apple sauce and combine. Serve with drizzle of honey and a sprinkle of cinnamon.

Apple Oatmeal