How My Son Made Me a Superhero

I teach US History for a day job.   We encounter many heroes in our class but what makes a person a hero or a superhero?  Is it a fancy suit, or a radioactive spider?  It seems if we really look at the superheroes it is their ability to assess a situation and relentlessly and courageously confront it.  There are true superheroes in our world from soldiers to law enforcement to girls shot for going to school.  But we all in our lives have times of conflict for one reason or another and all face opportunities to become superheroes in some capacity. 935679_642949243804_59478358_n

My father, and I’m sure countless before and since him, always told me that God often gives you what He knows you need not always what you expect.  I expected a perfect baby girl when I first got pregnant.  I got an imperfect baby boy.  We knew once he was born with a condition known as unilateral microtia-atresia that we would have hurdles to face for him as his parents and with him as well. His condition affects his hearing and how one ear did not fully form in the womb. We are not done with our battles but we are a step closer.

A little less than a year ago we scheduled his major reconstructive surgery.  This is the surgery that will give him the outer construction of an ear.  About eight months ago I began what I thought would be a battle with our insurance that became much more.  I knew going in that it wouldn’t be easy but I had no idea how tough it would be.  I tried to prepare myself, I started eating healthier, exercising more often, planning work ahead of time, and even distancing myself  from relationships that weren’t positive. But none of that fully prepared me.  Time and time again I would get denied, and time and time again I would send mountains of explanations why their specialists weren’t the same as the surgeon we chose or studies of why it was important to have his surgery at a specific age and with an experienced surgeon, knowing nothing I sent was even glanced at. I had days when I felt so defeated I had to take a minute in the car before I walked in to keep from falling apart, nights that I spent hours talking to God, and months when prayer candles were constantly lit. There were days when people were mean or dramatic and it didn’t even get to me because I already felt like I was walking around with an elephant sitting my heart. But no matter what I kept going because I knew my son was worth it.

It is not new news that the health insurance system in our country is broken.  Not only does universal healthcare seem to not be a viable option but our current system is not even set up to be a true market system because the consumer has no information, choice, or is in any way empowered to make decisions.  It has been baffling to me that had this issue been involving my car I would have had a claims adjuster who I knew and who was assigned to me but because it was my child that was not the case.  After months of frustration, defeat, and perseverance (more like stubbornness) I got a phone call.  A phone call from a woman who said said she wanted to help me and who actually listened to my case.  A week and a half later she called to tell me we won and his surgery would be covered.  I still can’t believe it’s over, I made her repeat herself to the point that she asked if the connection was bad.  The damn skeptic in me still thinks they are going to send me a letter saying PSYCHE! (fingers crossed they won’t) I feel like I’m going to burst from happiness and relief.  Our little joy boy doesn’t have any idea of the war we’ve fought.  He knows one month from today he is going to have surgery and thinks since he isn’t sick that after he’ll be a superhero.  He doesn’t know that just by having him in our lives he made us superheroes because now we are strong enough to face any fight.

Healthy Unstuffed Cabbage Rolls

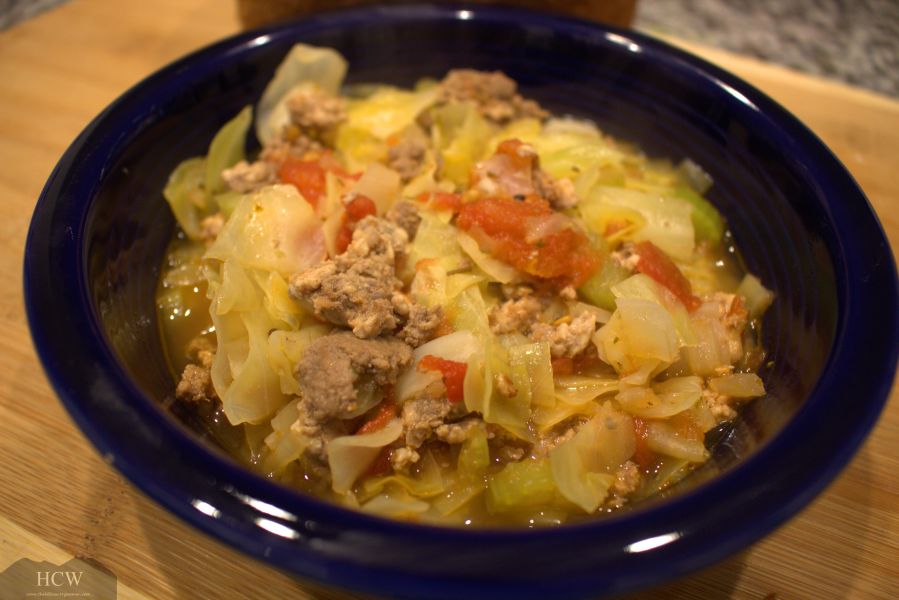
When I was little my mom used to make a cabbage soup whenever she was on her Weight Watchers diets.  Try as I might (and I very much tried as a chubby high school student) I could never stomach it.  The cabbage just grossed me out.  But it is so healthy that I have tried in various ways in my adult life, never to love it.  However, this my friends is a cabbage recipe for cabbage haters!  It is so tasty and delicious even my two year old eats it and says yummy!!!

Ingredients:

1 small-medium head of cabbage

1/2 white onion

2-3 garlic cloves

2-4 sticks of celery

1 lb ground meat – I used a mix of turkey and beef this time

1 pint of chopped tomatoes – a large can could work

1 tbs tomato paste

1/2 c vegetable or chicken broth

1/2 c water

1 tbs cumin

1 tbs oregano

1 tsp basil

2 bay leaves

salt and pepper to taste


Method:

First is my favorite part.  Chop your veggies while you let your meat brown.  I once worked as a soux chef at a Caribbean restaurant and my job on Saturday mornings was to hand chop veggies for all the salsas and sauces and I loved it!  Weird I know but there is something to the rhythm of it all that I find calming. IMG_4938 -1

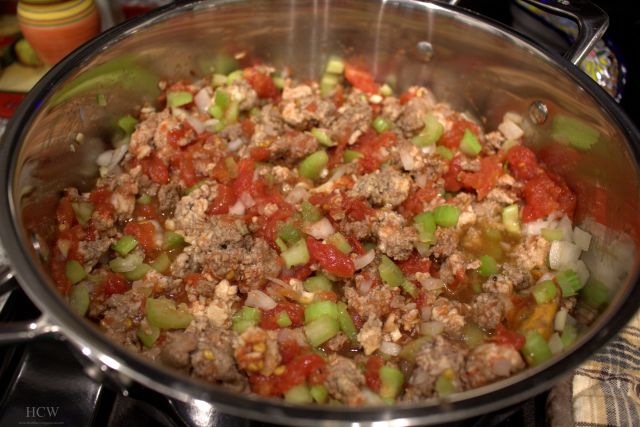
Once the meat has browned, drain the excess oil, and then mix with tomatoes, paste, garlic, onion, celery, herbs, and liquids and bring to a simmer. It should look colorful and lovely! IMG_4946 -1

Next fold in the cabbage.  Cover and let cook on medium heat 15-20 minutes or until cabbage and veggies are tender.  The broth and the tomatoes will turn the cabbage a gorgeous and yummy golden color.  Cool and enjoy!! IMG_4955 -1

Happy Cooking!!

Tempering Chocolat

One of my confessions is that I LOVE to work with chocolate.  If I could work all day with chocolate and have a stable income I would do it in a second.  I enjoy everything about it, the smell, the process, even the fickleness of it!  Tempering chocolate is just that, fickle.  It is a delicate process but one you have to learn to be able to truly work with chocolate versus just melting it and dipping stuff so if it doesn’t work right the first time don’t get discouraged.  When I first started working with chocolates it was the hardest thing for me by far but now I truly enjoy it!  Tempered chocolate is chocolate that sets quickly at room temperature, hardens as it dries, is shiny, has a smooth mouth taste, and doesn’t use its luster or soften at room temperature, think Godiva or a fancy chocolatier. Here is how to temper your own!

What you need:

Chocolate!! Good Quality – I used Ghiradelli milk chocolate- it can be dark, milk, or white this has instructions for all! The more you make the longer it will hold its temper.

A glass bowl- these are my absolute favorites for chocolate!

A digital thermometer- this is the one I use for chocolate

Method:

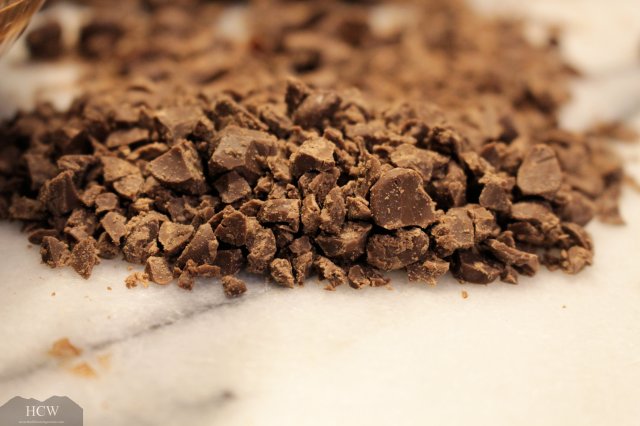
Chop your chocolate up! This is easier to do with bars than with chips but both need to be chopped.

IMG_4835

Once it is chopped you can either use a microwave (easiest and safest) or a double broiler. If you use the broiler make sure no water or steam touches the chocolate. Chocolate hates water!  Either way you are going to melt 70-75% of your chopped chocolate.  For microwaving, use 60 second intervals at 50% power stirring each time until the chocolate reaches between 155°-120°F (46°-49°C). Let set for 10 minutes.

IMG_4832

Once ten minutes is up you begin the “seeding” method which is adding chopped chocolate to the melted chocolate to reduce the temperature. Add handfuls and stir until fully incorporated and test the temperature each time. Your goal is to reach 86°F (30° C) for dark or 81°F (27°C) for milk or white. If I am tempering milk or white I only melt about 70% of my chocolate because it takes more to seed it. IMG_4837

Now it gets weird. Once your temperature is set you reheat the chocolate (I know but bear with me because it is so worth it).  For dark you need to reach 89°F (32°C) and for milk or white you need to reach 86°F (30°C).  Now you test for your temper. There are a few ways to do this but my favorite is the smear method. You just pour a strip of chocolate on parchment or wax paper and smear it a bit bit. If the line is clean and holds its shape it is tempered.  If it seems uneven or separated it is not.  The only trick now is to maintain the temper.  The easiest way to do this is reheat in small 4 second spurts and add some more chocolate if necessary. Once your chocolate heats over 90°F (32°C) the temper is broken so be careful!

You can use this to dip fruits, truffles, or do molds!

Happy Chocolate Making!!!

Easy and Simple Fruit Snacks

I think a battle many of us have as moms, or just people in this world, is the reality that sadly so much of our food contains artificial ingredients. From sweetners to dyes something always seems to be chemical. I have tried, especially since becoming a mother, to find more homemade ways to make a variety of foods that come more commonly “processed.” One of these as a the mother of a toddler is fruit snacks! Thomas first tried these when he sweet talked another child at daycare for some and came hold requesting something we had never had in our house. We have tried a variety of “healthier” alternatives but nothing ever quite did it for him before today.

DISCLAIMER: These are not beautiful and I will be updating this post with some more experiments on improving their appearance but they are so super yummy!!! Toddler and mom approved!

Ingredients:

1 Large Apple – or 2 small – I used a large Honeycrisp

1 cup Strawberries – stemmed and cored

1/2 cup blueberries

juice of 1/2 a lemon

1-2 tbs sugar

IMG_3878

Method:

First puree in a food processor the fruit and lemon juice until it is smooth.

IMG_3880

Then in a small pot on low-medium heat bring to a simmer, stirring almost constantly. Add sugar here.

IMG_3884

Continue stirring until the fruit thickens and is reduced and gorgeous! About 5-8 minutes.

IMG_3888

Line a baking sheet or 13-9 pan with parchment paper and pour mixture out evenly. Bake at 200° F for 4 hours until it is slightly sticky but doesn’t stick to your finger.

IMG_3892

   Because I used a cookie sheet mine came out so thin it broke apart. I am going to try a         13 x 9 pan next time to see if I can get them slightly thicker to keep shape but will probably take longer to cook.

IMG_3904

Happy Baking!!

Espresso Tuxedo Truffles

What seems like just a couple years ago (in reality nearly ten) I was working as an underwriter for an insurance company. Pretty much my job was to answer calls from agents and tell them what they could or couldn’t do or more often than not why they couldn’t. To say that it wasn’t the most exciting, I can’t wait to get to work, want to do this forever job is an understatement. However I was dating (now married to) a guy who lives his dream every day with his career. It was difficult to be as frustrated as I was and supportive at the same time. My solution was to find a challenging hobby that would take time to learn but that I could enjoy, so I dove head first into chocolate making. For nearly a year I stuck to recipes and trying different techniques. This was the first truffle I made solely on my own and I have never stopped loving it. I don’t make it often because chocolate making can take days and that is hard with a toddler but I always enjoy it when I do! This recipe is perfect for Valentines too!

Ingredients

1/4 cup Heavy Whipping Cream

1/2-1 shot espresso – you can brew your own if you’re super fancy. I went to Starbucks

1-2 tbs good quality salted butter cubed and at room temp – I used Central Market brand

8 oz good quality bittersweet chocolate – I used Ghiradelli 80% this time

4-8 oz good quality white chocolate – I used Ghiradelli

good quality ground espresso or coffee beans for dusting

Method

First chop the bittersweet chocolate and place in glass bowl – glass is the best for working with chocolate because of how it distributes the temperature.

Next in a small sauce pan bring the cream and espresso to a rolling boil. Then pour the cream mixture onto the chopped chocolate. Let sit for 2 minutes! This allows the chocolate to begin melting into the mixture. Slowly using a whisk blend the mixture and chocolate. At first stir in one direction. It is SUPER important to do this very slowly because you don’t want to introduce air into the mixture and too fast will make the chocolate separate and you will end up with a broken ganache and a sad gooey mess. Once it is emulsified add the butter and continue stirring until combined. It should look rich, silky, and delicious!

IMG_3421

This makes me happy everytime!! Next use a pipping bag to put the ganache onto baking sheet lined with parchment paper to set. Set it at room temperature somewhere dry overnight if you can or for a least a couple hours. Moisture is bad for the chocolate which is why you don’t want to put it in the fridge.

IMG_3425

Once they have set roll them to make sure they are in the form you want. At this point you could roll in cocoa,nuts, or other toppings, or you could dip them. To make them tuxedo (white and black or dark) I dip them in white. I love the white with dark chocolate because I think the dark brings out the espresso best and the super sweetness of the white compliments the slight bitterness of the dark. IMG_3442

Once the chocolate has been tempered (more on that in a later blog) I use a Wilton chocolate bowl to keep it at a steady temperature. I double dip these lovelies to make them coated in two thin layers. Place on a new sheet of parchment paper and let set. While they are setting lightly sprinkle with ground espresso. IMG_3444

Enjoy!!

IMG_3448

Check back with us soon we have some big news coming!

Happy Baking!!


Easy and Perfect Good Luck Salsa

Growing up in the South one of the New Years traditions is to eat black eyed peas for good luck. My mother is cajun through and through, which is one reason I think she just loves most superstitions. But regardless of her reasons, she always made us eat black eyed peas (at least 12 for the months) growing up. My confession is that I have always hated them!! I think they smell awful and my little dramatic childhood self would feign gagging on each bite.

All that changed when my sister introduced us to Texas Caviar. The kind we originally had was called Hill Country Caviar from New Canaan Farms (http://newcanaanfarms.com/) and it was amazing as is everything from them! It was essentially salsa with black eyed peas. I loved it then and LOVE it still today!!

Of course as a college kid on a budget who worked retail and didn’t live in Texas I had to figure out a way to make it since I didn’t get to go home around that time. This recipe is one I’ve tweaked over the years and is really just simple and basic pico recipe with black eyed peas mixed in but it amazingly fresh and tasty!

Ingredients

1-2 tomatoes – I used about 1 1/2 diced

1/2-1 onion – I used about a 1/2 diced

1-2 fresh jalapeños – I used 1 diced

1 clove of garlic – minced

1/2-1 bunch cilantro – really do to taste for you. I used less this time because my hubby is not a fan

1 cup black eyed peas – I measured before I cooked them. It made about two pints and I used one pint so probably a little more than a can if you bought them canned just remember to drain and rinse – cook as it says on package, cool, drain, and rinse.

Juice of 1 lime

Salt to taste – I used about 1 tbs

Avocado to garnish – I would add it right in but it lasts longer if you add this as you eat

First combine tomatoes, onions, jalapeno, cilantro, and peas. You can dice using a food processor and the entire process takes about 10 minutes. Then add juice and salt to taste. If you like blended salsa you could definitely do that here and have it smoother but I like chunky.

Enjoy as is or add avocados or anything else your heart desires. I have also seen it with corn and other yummy stuff but the simple is my favorite. This recipe makes close to 2 pint jars and will last a couple weeks in the fridge but honestly probably won’t last that long because it is amazing!!

IMG_0760 (2)

Happy Cooking and Happy New Year!

Quinoa Taco One Pot Dinner

This is possibly the easiest and healthiest thing I make on a regular basis because it is so flavorful!!! I saw a recipe on fb about a one pot italian dinner with rice, for the life of me I have searched but can’t find the exact one but this is similar (http://www.bettycrocker.com/recipes/italian-beef-and-rice-skillet/42364ff9-961d-43e1-bef5-e038e19b0083). It sounded great but I didn’t have all the ingredients and wanted a way to make it healthier so I tweaked it!! When I first said I was doing a quinoa taco bake my husband said he thought I’d be slaughtering the good name that is tacos but he loves it. I will be honest that it isn’t the prettiest thing (my two year old says it looks like bugs) but it sure is yummy. Hope you enjoy it as much as we do!

Ingredients:

1 C of quinoa cooked (I used a mix of red and white quinoa)

1/2 -1 lb ground meat (I used half ground turkey and half ground beef)

1 C black beans (I cook, bag, and freeze mine so I use one small ziploc but you can just as easily use 1 can) drained and rinsed

1 pint jar canned tomatoes (or you could use a large can) (12-16oz)

1/8 c cooked green chilis (you could use 1/2 a can or freeze your own!!)

1 tbs chili powder

1/2 tbs paprika

1/2 tbs cumin

1 tsp garlic powder

1 tsp onion powder

Brown meat, heat beans, and cook quinoa. Once done mix them together and add seasonings. Add in tomatoes with their juice green chilis and let simmer. Quinoa Taco One Pot

Once the juice has been absorbed it is ready to eat! We serve with everything from cheese, avocado, lettuce, to sour cream for our toddler to make it a bit more mild. It is easy, filling, healthy, and so delicious!!

Quinoa Taco One Pot

Happy Cooking!